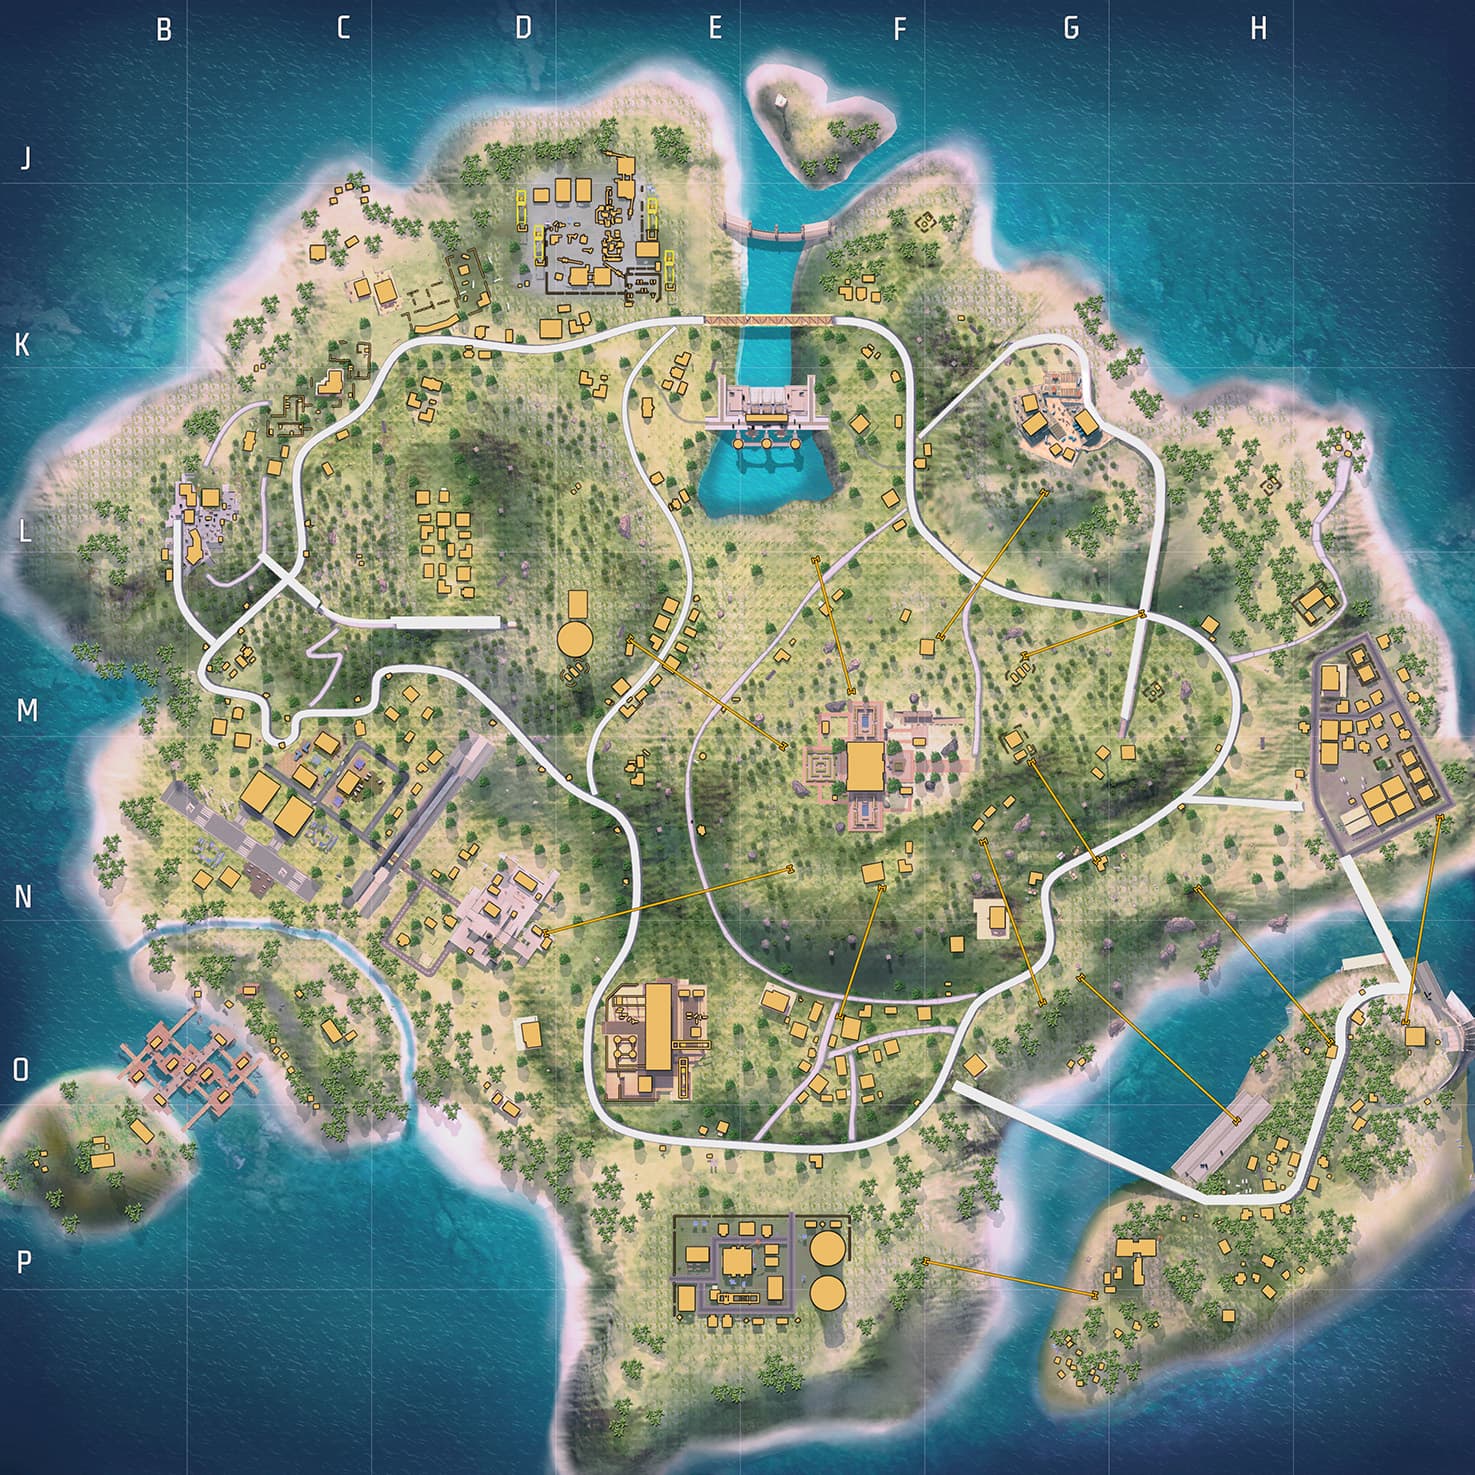
Key Takeaways
- Bermuda's compact 2×2 km footprint forces early contact within 60-90 seconds; dropping without a designated Phase 1 rotation route leads to lethal mid-game pinches.
- MapLainer reveals all 6 Arsenal vaults, 13 Revival Points (Hearts), and 18 Vending Machines with exact coordinates for route planning.
- The Sentosa-to-Cape Town rotation provides unmatched early loot with access to the Eastern Arsenal (x: 81.3, y: 54.8) and an early zipline ascent to Peak.
- For high-kill lobbies, dropping Pochinok yellow houses with Skyler + Oscar/Tatsuya allows squads to wipe early contest, loot the Vending Machine, and claim the South Arsenal (x: 49.2, y: 72.3).
- Safe rank-push players should anchor at Cape Town, Rim Nam Village, or Observatory to gather 600+ FF Coins before making edge-circle rotations.
Why Bermuda Strategy Decides Free Fire Tournament Champions
Spanning an intense 2 km × 2 km tropical layout, Bermuda is the flagship arena of Garena Free Fire. Its dense central hub—dominated by Peak, Pochinok, Bimasakti Strip, and Factory—creates a relentless combat tempo, while outer coastal enclaves reward disciplined loot acquisition and patient edge rotations.
In tournament play and high-tier Master/Grandmaster rank lobbies, winning on Bermuda is rarely about out-aiming 48 players. It is about controlling early resource triangles: looting your drop compound, converting 600 FF Coins into an Arsenal Key at a nearby Vending Machine, and holding high-ground overwatch along the ridgeline of Peak or Observatory before the Phase 3 storm collapses.
Start drawing squad routes, Arsenal key pushes, and Safe Zone circles on Bermuda.
Deploy Bermuda Strategy BoardBermuda Drop Zone Classification: Hot Drops, Balanced Staging & Safe Havens
Bermuda features 20 officially designated landmarks. Understanding each POI's loot density, vehicle access, and contest frequency is fundamental to planning tournament drops:
| Landmark | Drop Tier | Combat Style | Key Assets & Rotation Value |
|---|---|---|---|
| Peak | Hot | Aggressive | Central 360° sightlines, high loot, Vending Machine + Revival Point |
| Pochinok | Hot | Aggressive | Dense multi-story CQC, central Vending Machine, fast link to South Arsenal |
| Bimasakti Strip | Hot | Aggressive | Linear high-risk corridor, central Vending Machine, observation tower |
| Factory | Hot | Aggressive | Multi-floor vertical fighting, Vending Machine, quick access to South Arsenal |
| Mill | Medium | Balanced | Elevated fortress, Vending Machine + Revival Point, northeast power position |
| Clock Tower | Medium | Balanced | Elevated structures, Vending Machine + Revival Point, overwatch on Factory |
| Plantation | Medium | Balanced | Sprawling farmland, central Vending Machine, ideal staging into Bimasakti |
| Keraton | Medium | Balanced | Walled compound, structured indoor defense, calm eastern staging |
| Shipyard | Medium | Balanced | Northern maritime warehouses, Vending Machine, zipline escape to Mill |
| Hangar | Medium | Balanced | Wide open vehicle bays, Vending Machine + Revival Point, sniper sightlines |
| Kota Tua | Medium | Balanced | Colonial buildings, Vending Machine, direct link to East Arsenal |
| Cape Town | Safe | Passive | Southeast coastal town, Vending Machine + Revival Point, safe AR looting |
| Sentosa | Safe | Passive | Isolated island, rich loot, Vending Machine + Revival Point, bridge caution |
| Rim Nam Village | Safe | Passive | Southwest river village, Vending Machine + Revival Point, ultra-safe rank gear |
| Observatory | Safe | Passive | Northwest mountain facility, Vending Machine, high-altitude perimeter hold |
The 6 Bermuda Arsenals: Exact Coordinates & Breach Tactics
Breaching an Arsenal is the single fastest way to equip an entire squad with Level 3 vests, Level 3 helmets, upgraded chip weapons, and plentiful Gloo Walls. MapLainer tracks all 6 Arsenal coordinates on Bermuda:
- Northwest Arsenal (x: 36.1, y: 28.2): Positioned in the triangle between Graveyard, Bullseye, and Plantation. Excellent for squads looting northern edge drops.
- Northeast Arsenal (x: 60.2, y: 43.8): Nestled on the hillside between Riverside and the eastern slopes of Peak. High-traffic zone; always scout the ridgeline before unlocking.
- Eastern Arsenal (x: 81.3, y: 54.8): Located along the coastal road between Kota Tua and Cape Town. The cornerstone of the popular Sentosa/Cape Town rotation.
- Southern Arsenal (x: 49.2, y: 72.3): Sitting in the flatlands between Factory and Pochinok. The primary target for teams that wipe Pochinok early.
- Western Arsenal (x: 23.0, y: 61.6): Situated west of Clock Tower, directly beneath Hangar's industrial line.
- South-Central Arsenal (x: 44.4, y: 60.0): Positioned on the elevated ridge overlooking Clock Tower and Factory.
Revival Hearts & Vending Machine Token Strategy
With 13 Revival Points and 18 Vending Machines spread across Bermuda, smart IGLs designate a 'Banker' who pools FF Coins. In modern tournament rules, an early knock should not cost you placement points if your team has planned a Revival Heart fallback.
- Target 600 FF Coins in Phase 1: Clear two multi-room buildings to gather 600+ coins, then purchase an Arsenal Key at the nearest Vending Machine.
- Reserve 400 Coins for Emergency Revivals: Keep 400 FF Coins untouched on your designated anchor so you can purchase an instant Revival Card if your rusher falls.
- Safe Revival Heart Clusters: Sentosa (x: 82.1, y: 78.5), Rim Nam Village (x: 15.7, y: 69.4), and Mill (x: 73.4, y: 26.2) offer the safest cover for reviving fallen teammates.
3 Pro IGL Rotation Playbooks for Bermuda
Here are three battle-tested rotation playbooks drawn directly from competitive scrims and our community's tactical feedback:
Playbook A: The Sentosa -> Cape Town Arsenal -> Peak Ridge Route
1. Drop & Loot: Split drop across Sentosa, securing Level 2 gear and 800+ team FF Coins. Use the Sentosa Vending Machine to buy an Arsenal Key.
2. Arsenal Breach: Rotate across the eastern bridge into the East Arsenal (x: 81.3, y: 54.8). Ambush any squad rotating late out of Cape Town.
3. Zipline Ascent: Take the eastern zipline upward toward the Peak ridge compound. You arrive in the Phase 3 circle fully kitted with AWMs and Level 3 armor while central squads are depleted from early fights.
Playbook B: Pochinok High-Kill Brawl -> South Arsenal -> Clock Tower Hold
1. Pochinok Breach: Drop on the yellow multi-story compounds in Pochinok. Use Skyler to break enemy Gloo Walls and Tatsuya/Oscar to clear ground-floor defenders.
2. South Arsenal Push: Hit the Pochinok Vending Machine (x: 55.4, y: 73.6) and immediately push east to unlock the South Arsenal (x: 49.2, y: 72.3).
3. Clock Tower Gatekeep: Avoid charging straight uphill into Peak's crossfire. Instead, flank northwest toward Clock Tower, gatekeeping squads rotating from Hangar and Rim Nam Village.
Playbook C: Katulistiwa -> Bullseye -> Observatory Edge Glide
1. Safe Staging: Land at Katulistiwa with Bullseye as your flight-path fallback. Collect early sniper rifles and scopes.
2. Observatory Hold: Move west along the paved mountain road to Observatory. This gives your sniper commanding sightlines over Hangar while your back is sealed by the ocean.
3. Zone Edge Pinch: As Safe Zone 3 shrinks inward, advance along the ridgeline between Graveyard and Plantation to claim Peak's back slope.
Recommended Character Combos for Bermuda Tournaments
Because Bermuda transitions rapidly from close-quarters house fighting to wide-open ridge snipes, your squad needs specialized character synergies:
- Entry Rusher: Tatsuya (Rapid Dash) + Hayato (Armor Pen) + Kelly (Sprint Speed) — crucial for clearing Pochinok and Factory rooms.
- Gloo Breacher: Skyler (Riptide Rhythm) + Alvaro (Explosive Damage) + Maxim (Fast Medkits) — instantly nullifies enemy Gloo Wall forts at Arsenal doors.
- Scout & Sniper: Oscar / Moco (Hacker's Eye tag) + Rafael (Silent Sniper kills) — tags targets across the Bimasakti Strip and Peak slopes.
- IGL / Anchor: Dimitri / Alok + Sonia (Second Chance shield) + Nairi (Indestructible Gloo Walls) — guarantees clutch revivals during late-zone pinches.
Frequently Asked Questions
What is the safest drop spot on Bermuda for rank pushers?
Cape Town and Rim Nam Village are the two safest locations on Bermuda. Both sit along the extreme coastline with dedicated Vending Machines and nearby Revival Points, letting squads collect Level 2 gear and 400+ FF Coins with almost zero risk of early elimination.
Where are all 6 Arsenals located on Bermuda?
The 6 Arsenals are distributed tactically across the map: 1) Northwest near Graveyard/Bullseye (x: 36.1, y: 28.2), 2) Northeast hillside between Riverside and Peak (x: 60.2, y: 43.8), 3) East between Kota Tua and Cape Town (x: 81.3, y: 54.8), 4) South between Factory and Pochinok (x: 49.2, y: 72.3), 5) West near Clock Tower/Hangar (x: 23.0, y: 61.6), and 6) South-Central ridge above Factory (x: 44.4, y: 60.0).
How do I get an Arsenal Key on Bermuda?
You can purchase an Arsenal Key from any of Bermuda's 18 Vending Machines for 600 to 800 FF Coins, or discover one as a rare ground drop in high-density loot zones like Peak, Pochinok, Mill, or Factory.
Should my squad drop at Peak in competitive tournaments?
In high-tier tournaments, hot-dropping into the open center of Peak is high-risk due to multi-squad crossfires. The pro meta is to drop at a neighboring compound (like Plantation, Mill, or Pochinok), gear up with Level 3 armor via an Arsenal, and rotate onto the Peak ridgeline in Phase 3 to gatekeep incoming squads.
How can I plan Bermuda rotations on MapLainer?
Visit /draw/bermuda to launch the interactive strategy board. Turn on the Vending Machine, Arsenal, and Revival Point overlays in the top toolbar, use the Safe Zone tool (Z1-Z6) to project the storm circle, and download your squad's strategy as a high-res PNG image.