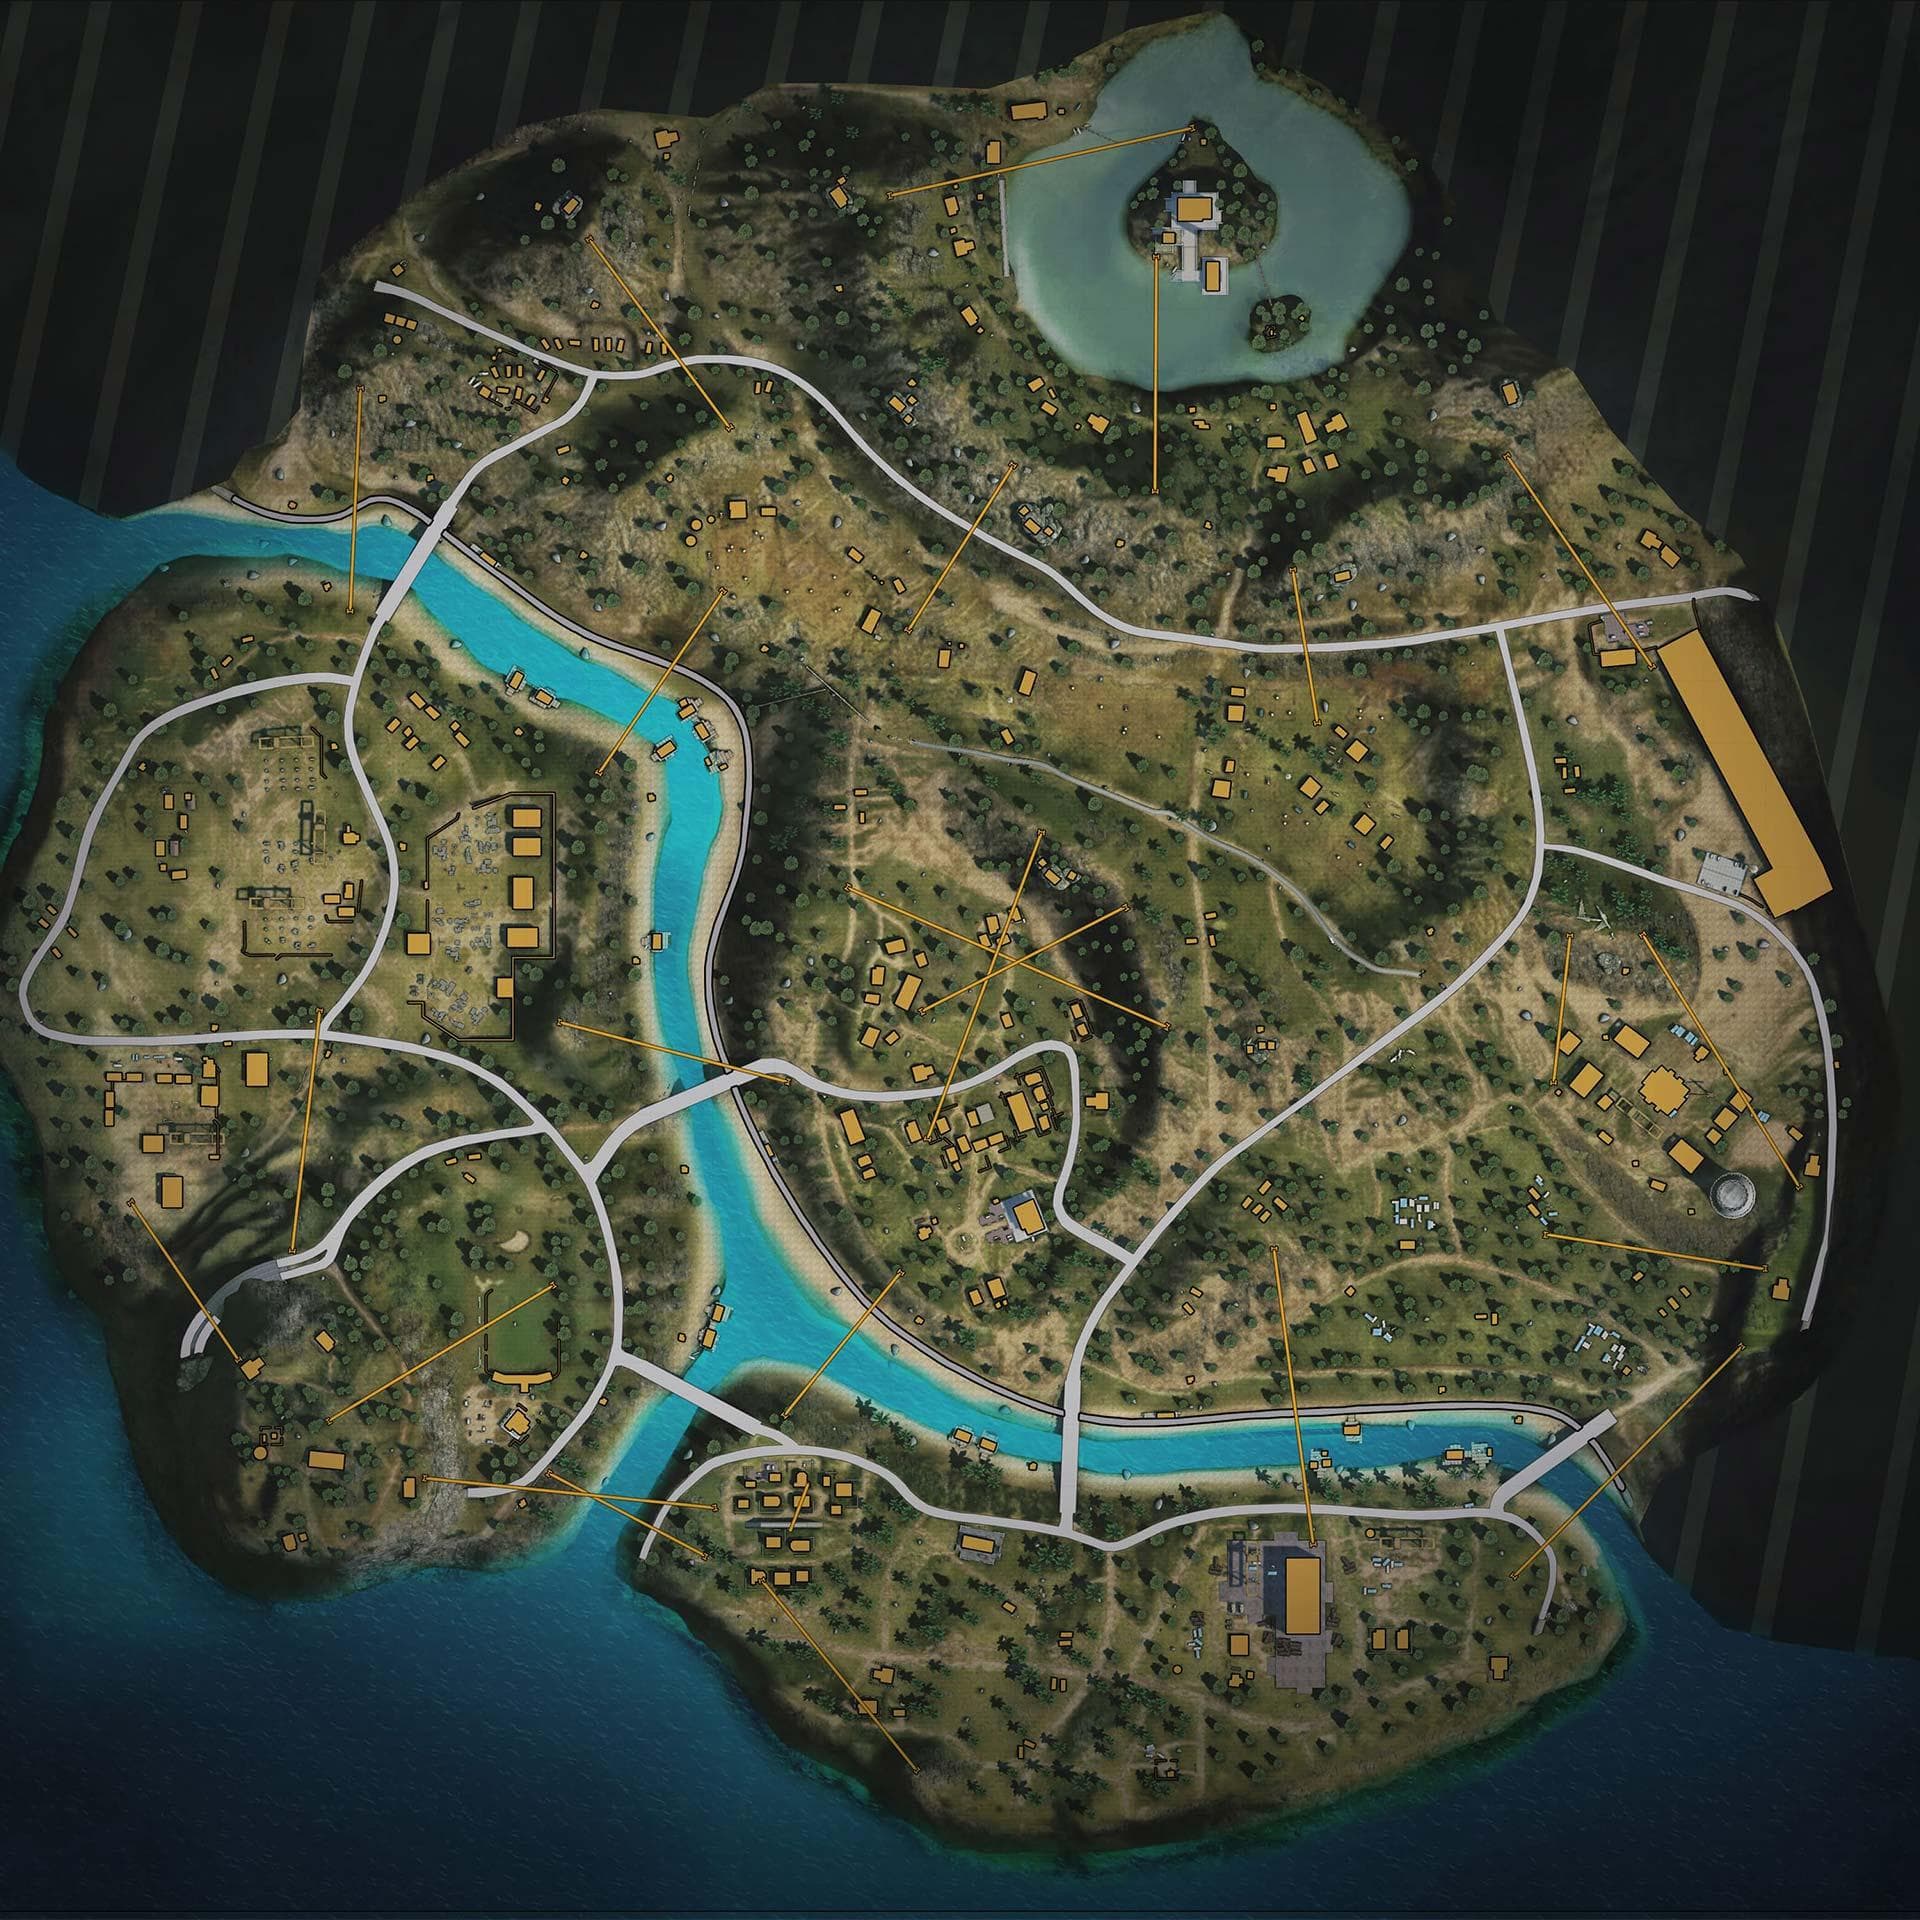
Key Takeaways
- Purgatory's 3-island river system creates lethal bridge choke points; cross the river before Phase 2 closes to avoid gatekeep wipes.
- MapLainer reveals all 5 Arsenals and 16 Vending Machines on Purgatory, plus all 5 Arsenals and 15 Vending Machines on Kalahari with exact coordinates.
- On Kalahari, lateral movement at canyon bottoms is fatal; pro IGLs prioritize elevation on Refinery (x: 45.1, y: 51.3), Command Post, and Foundation scaffolding.
- Token economy is game-winning: edge-droppers at Mt. Villa / Golf Course (Purgatory) or Old Hampton / Shrines (Kalahari) can safely farm 800+ FF Coins and breach an Arsenal before Phase 3.
- Unlike compact Bermuda, vehicles are mandatory for crossing northern Purgatory fields and open Kalahari sand dunes—until reaching vertical rock cover.
Why Purgatory & Kalahari Test True IGL Macro Leadership
While Bermuda rewards lightning-fast brawls inside compact housing compounds, Purgatory (2.2 km × 2.2 km) and Kalahari (2.5 km × 2.5 km) are pure tests of an In-Game Leader's (IGL) macro vision. Both battlegrounds feature punishing environmental choke points:
On Purgatory, a wide river slices the island into three distinct territories connected by narrow bridges and exposed ziplines. On Kalahari, towering sandstone bluffs, multi-tiered industrial scaffolding, and vast barren sand dunes punish any squad caught rotating on foot at canyon bottoms.
Purgatory Strategic Breakdown: River Bridges, Brasilia & Token Economy
Purgatory's geographical layout splits teams between the high-elevation northern estates (Moathouse, Ski Lodge) and the dense urban settlements of the south (Brasilia, Central, Fire Brigade). Controlling the river transition dictates match outcomes.
All 5 Purgatory Arsenals (Exact Map Coordinates)
1. North-East Arsenal (x: 59.2%, y: 25.8%): Located south of Moathouse, directly overlooking Fields.
2. North-West Arsenal (x: 38.3%, y: 28.9%): Positioned between Crossroads and the western river bridge.
3. Central Arsenal (x: 42.2%, y: 46.3%): Situated at the northwest approach to Brasilia.
4. South-West Arsenal (x: 26.9%, y: 61.1%): Positioned between Marbleworks and Golf Course.
5. South-East Arsenal (x: 54.8%, y: 82.3%): Directly east of the Fire Brigade station.
16 Vending Machines & The River Bridge Rule
With 16 Vending Machines spread across Purgatory, teams dropping at Moathouse (2 machines), Brasilia (central machine), or Golf Course can reliably farm 600–800 FF Coins. However, the Golden Rule of Purgatory is simple: Never cross the river after Phase 2 begins closing. Waiting for Phase 3 forces your squad to fight through entrenched bridge gatekeepers with zero natural cover.
Plot your squad's river bridge crossings and Vending Machine token routes on Purgatory.
Deploy Purgatory Strategy Board2 Proven Purgatory IGL Playbooks
These two rotation paths maximize loot security while avoiding the lethal middle-bridge crossfire:
- Playbook 1: Moathouse Fortress -> North-East Arsenal -> Middle Bridge Lock. Land Moathouse (x: 61.0, y: 11.5), collect 800+ FF Coins from the two northern Vending Machines, drive south to unlock the North-East Arsenal (x: 59.2, y: 25.8), and cross the middle bridge before Phase 2 closes to secure the southern bridgehead.
- Playbook 2: Mt. Villa / Golf Course Safe Drop -> South-West Arsenal -> Brasilia Underbelly. Drop in the quiet southwest (Mt. Villa x: 15.9, y: 75.0 or Golf Course x: 26.9, y: 69.7), gear up via local Vending Machines, breach the South-West Arsenal (x: 26.9, y: 61.1), and advance along the elevated ridge into Brasilia's back flank.
Kalahari Strategic Breakdown: Vertical Ridgelines, Refinery & 15 Coin Spots
Kalahari is Free Fire's most vertical battleground. Its 13 landmarks are surrounded by rocky ridges, ancient rib-cages, and high-altitude platforms. On Kalahari, the team that holds the highest rock controls the entire valley.
| Arsenal Vault | Map Coordinates | Primary Strategic Value | Nearest Vending Machine |
|---|---|---|---|
| North Arsenal | x: 50.1%, y: 28.3% | Controls northern desert corridor below Shrines | Shrines (x: 45.0, y: 19.7) |
| Central-West Arsenal | x: 36.0%, y: 38.5% | High-ground access to Foundation & Refinery | Foundation (x: 27.1, y: 37.5) |
| East-Central Arsenal | x: 69.0%, y: 47.1% | Links Bayfront and Santa Catarina ridgelines | Bayfront (x: 60.7, y: 38.2) |
| South-East Arsenal | x: 66.7%, y: 65.7% | Dominates the road approaching Command Post | Command Post (x: 61.3, y: 65.4) |
| South-West Arsenal | x: 25.4%, y: 67.6% | Guards passage between The Maze & Mammoth | The Maze (x: 26.9, y: 56.8) |
Chart your high-ground ridge holds and 15 coin station paths on Kalahari.
Deploy Kalahari Strategy Board2 Proven Kalahari IGL Playbooks
Use these battle-tested rotation lines to conquer Kalahari's vertical desert terrain:
- Playbook 1: Refinery Center-Control & Scaffolding Overwatch. Drop on the upper catwalks of Refinery (x: 45.1, y: 51.3), clear the central oil rig with SMGs, use the Refinery Vending Machine (x: 47.8, y: 50.9) to buy an Arsenal Key, and unlock the Central-West Arsenal (x: 36.0, y: 38.5) while snipers hold top crane overwatch.
- Playbook 2: Old Hampton / Shrines Edge Economy -> North Arsenal -> Bayfront Ridge. Drop Old Hampton (x: 23.4, y: 17.5) or Shrines (x: 47.5, y: 18.0) for zero-risk coin farming. Unlock the North Arsenal (x: 50.1, y: 28.3) and advance east along the elevated Council Hall / Bayfront ridgeline, picking off enemies caught down in the sand.
Purgatory vs. Kalahari: Tactical Comparison for Tournament IGLs
When shifting your squad between Purgatory and Kalahari in competitive match sets, adjust your weapon loadouts and vehicle pacing according to this matrix:
| Tactical Dimension | Purgatory (2.2 × 2.2 km) | Kalahari (2.5 × 2.5 km) |
|---|---|---|
| Primary Choke Mechanism | 3 River Bridges & Water Crossings | Sandstone Cliffs & Canyon Basins |
| Mandatory Weapon Loadout | AR + Sniper + Grenade Launcher | Dual Snipers (AWM/M82B) + Shotgun |
| Vehicle Pacing | High (North Fields & Bridge Rush) | High (Open Sand Dunes Only) |
| Central Power POI | Brasilia (x: 48.9, y: 54.2) | Refinery (x: 45.1, y: 51.3) |
| Safest Rank Drop | Mt. Villa / Golf Course | Old Hampton / Shrines / Mammoth |
| Arsenals / Vending Count | 5 Arsenals / 16 Vending Machines | 5 Arsenals / 15 Vending Machines |
Frequently Asked Questions
How do I see Vending Machine token points and Arsenals on Purgatory and Kalahari?
Open /draw/purgatory or /draw/kalahari on MapLainer and tap the Shopping Cart icon in the upper-right toolbar to toggle all Vending Machines, and the House icon to toggle all 5 Arsenal vaults.
When is the best time to cross the river on Purgatory?
Cross the river toward the Safe Zone before Phase 2 finishes shrinking. Waiting for Phase 3 guarantees that squads who dropped in Brasilia and Central will be waiting with snipers and grenade launchers to gatekeep the bridges and zipline exits.
Why is a sniper rifle mandatory on Kalahari?
Kalahari's desert landscape consists of wide-open sand basins between high sandstone cliffs. A skilled sniper equipped with Rafael and Maro can lock down an entire squad moving through a canyon from hundreds of meters away.
Where are the safest drop spots for rank pushers on Purgatory and Kalahari?
On Purgatory, Mt. Villa, Golf Course, and Quarry offer safe looting with nearby Vending Machines and vehicles. On Kalahari, Old Hampton, Shrines, and Mammoth provide calm coin collection and direct access to outer Arsenals.
How do I download and share my Purgatory or Kalahari strategy map on mobile?
Once you have drawn your Safe Zones (Z1-Z6), rotation paths, and squad markers, tap the 'Download' icon (tray with downward arrow) in the top-left toolbar of the map board to export a high-definition PNG image directly to your mobile phone's photo gallery.